Getting started with applications
The Conduit Platform dashboard is a point-and-click solution for building and deploying applications that move and process data in real-time. The easy to use interface allows data teams to effortlessly configure connections to sources and destinations, leverage built-in processors for data transformation, and control the direction of data flow using conditions.
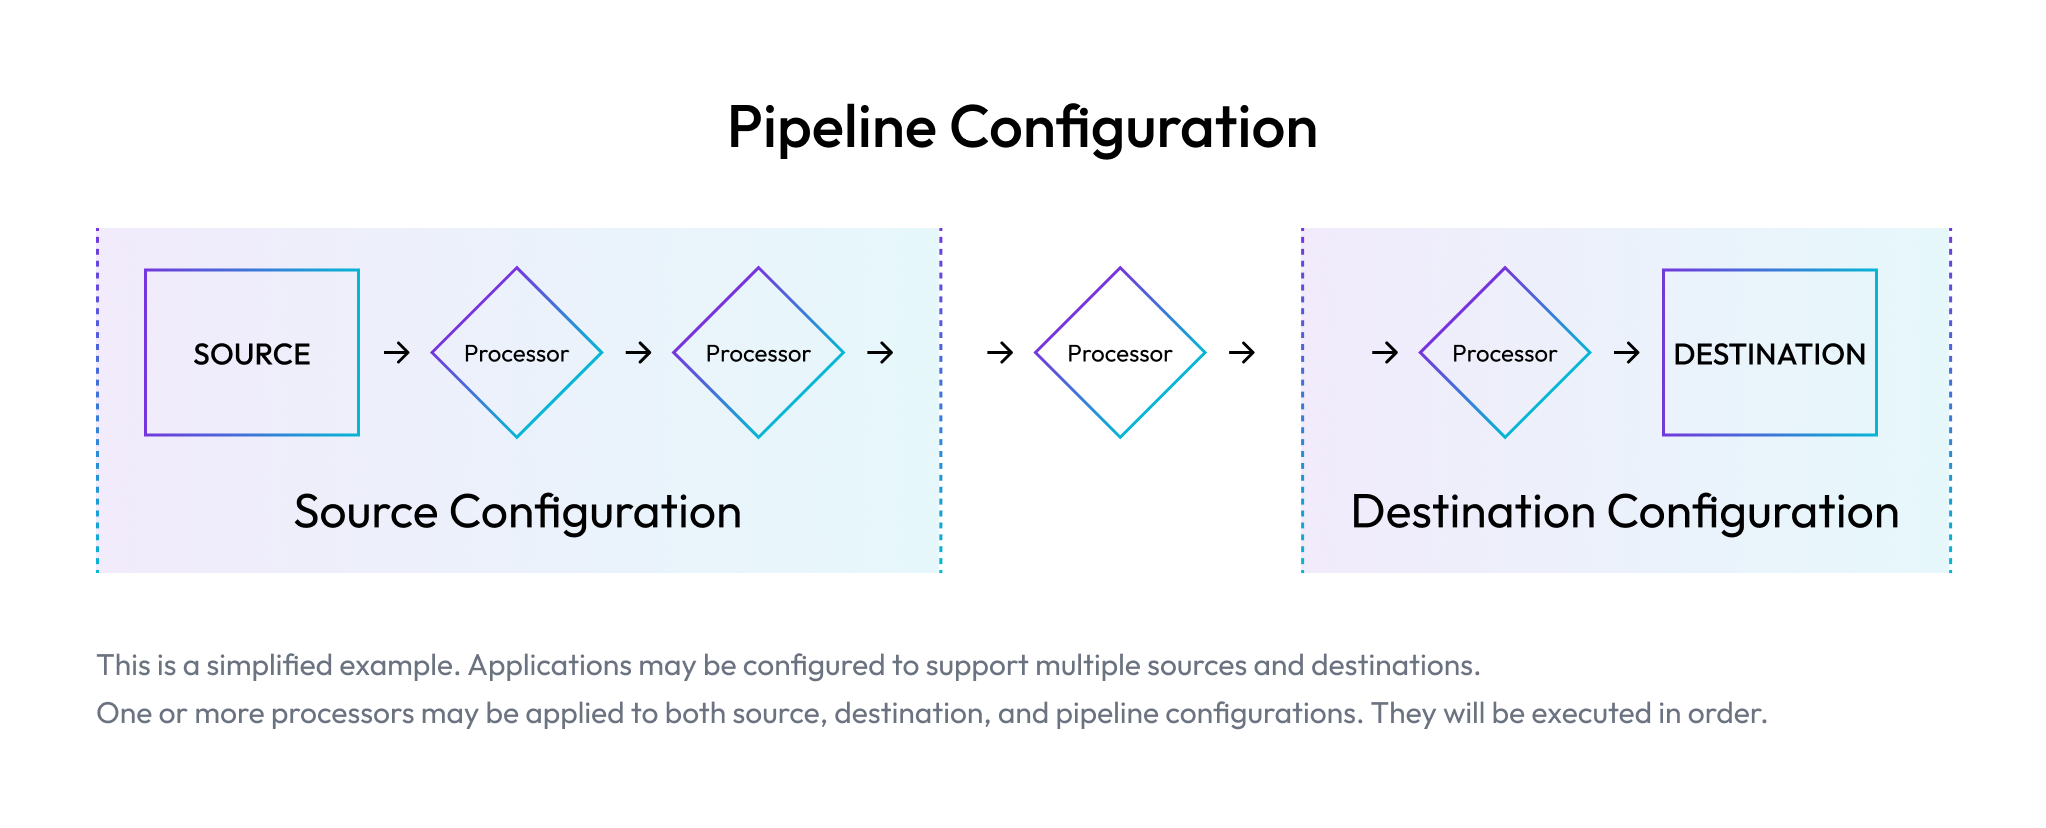
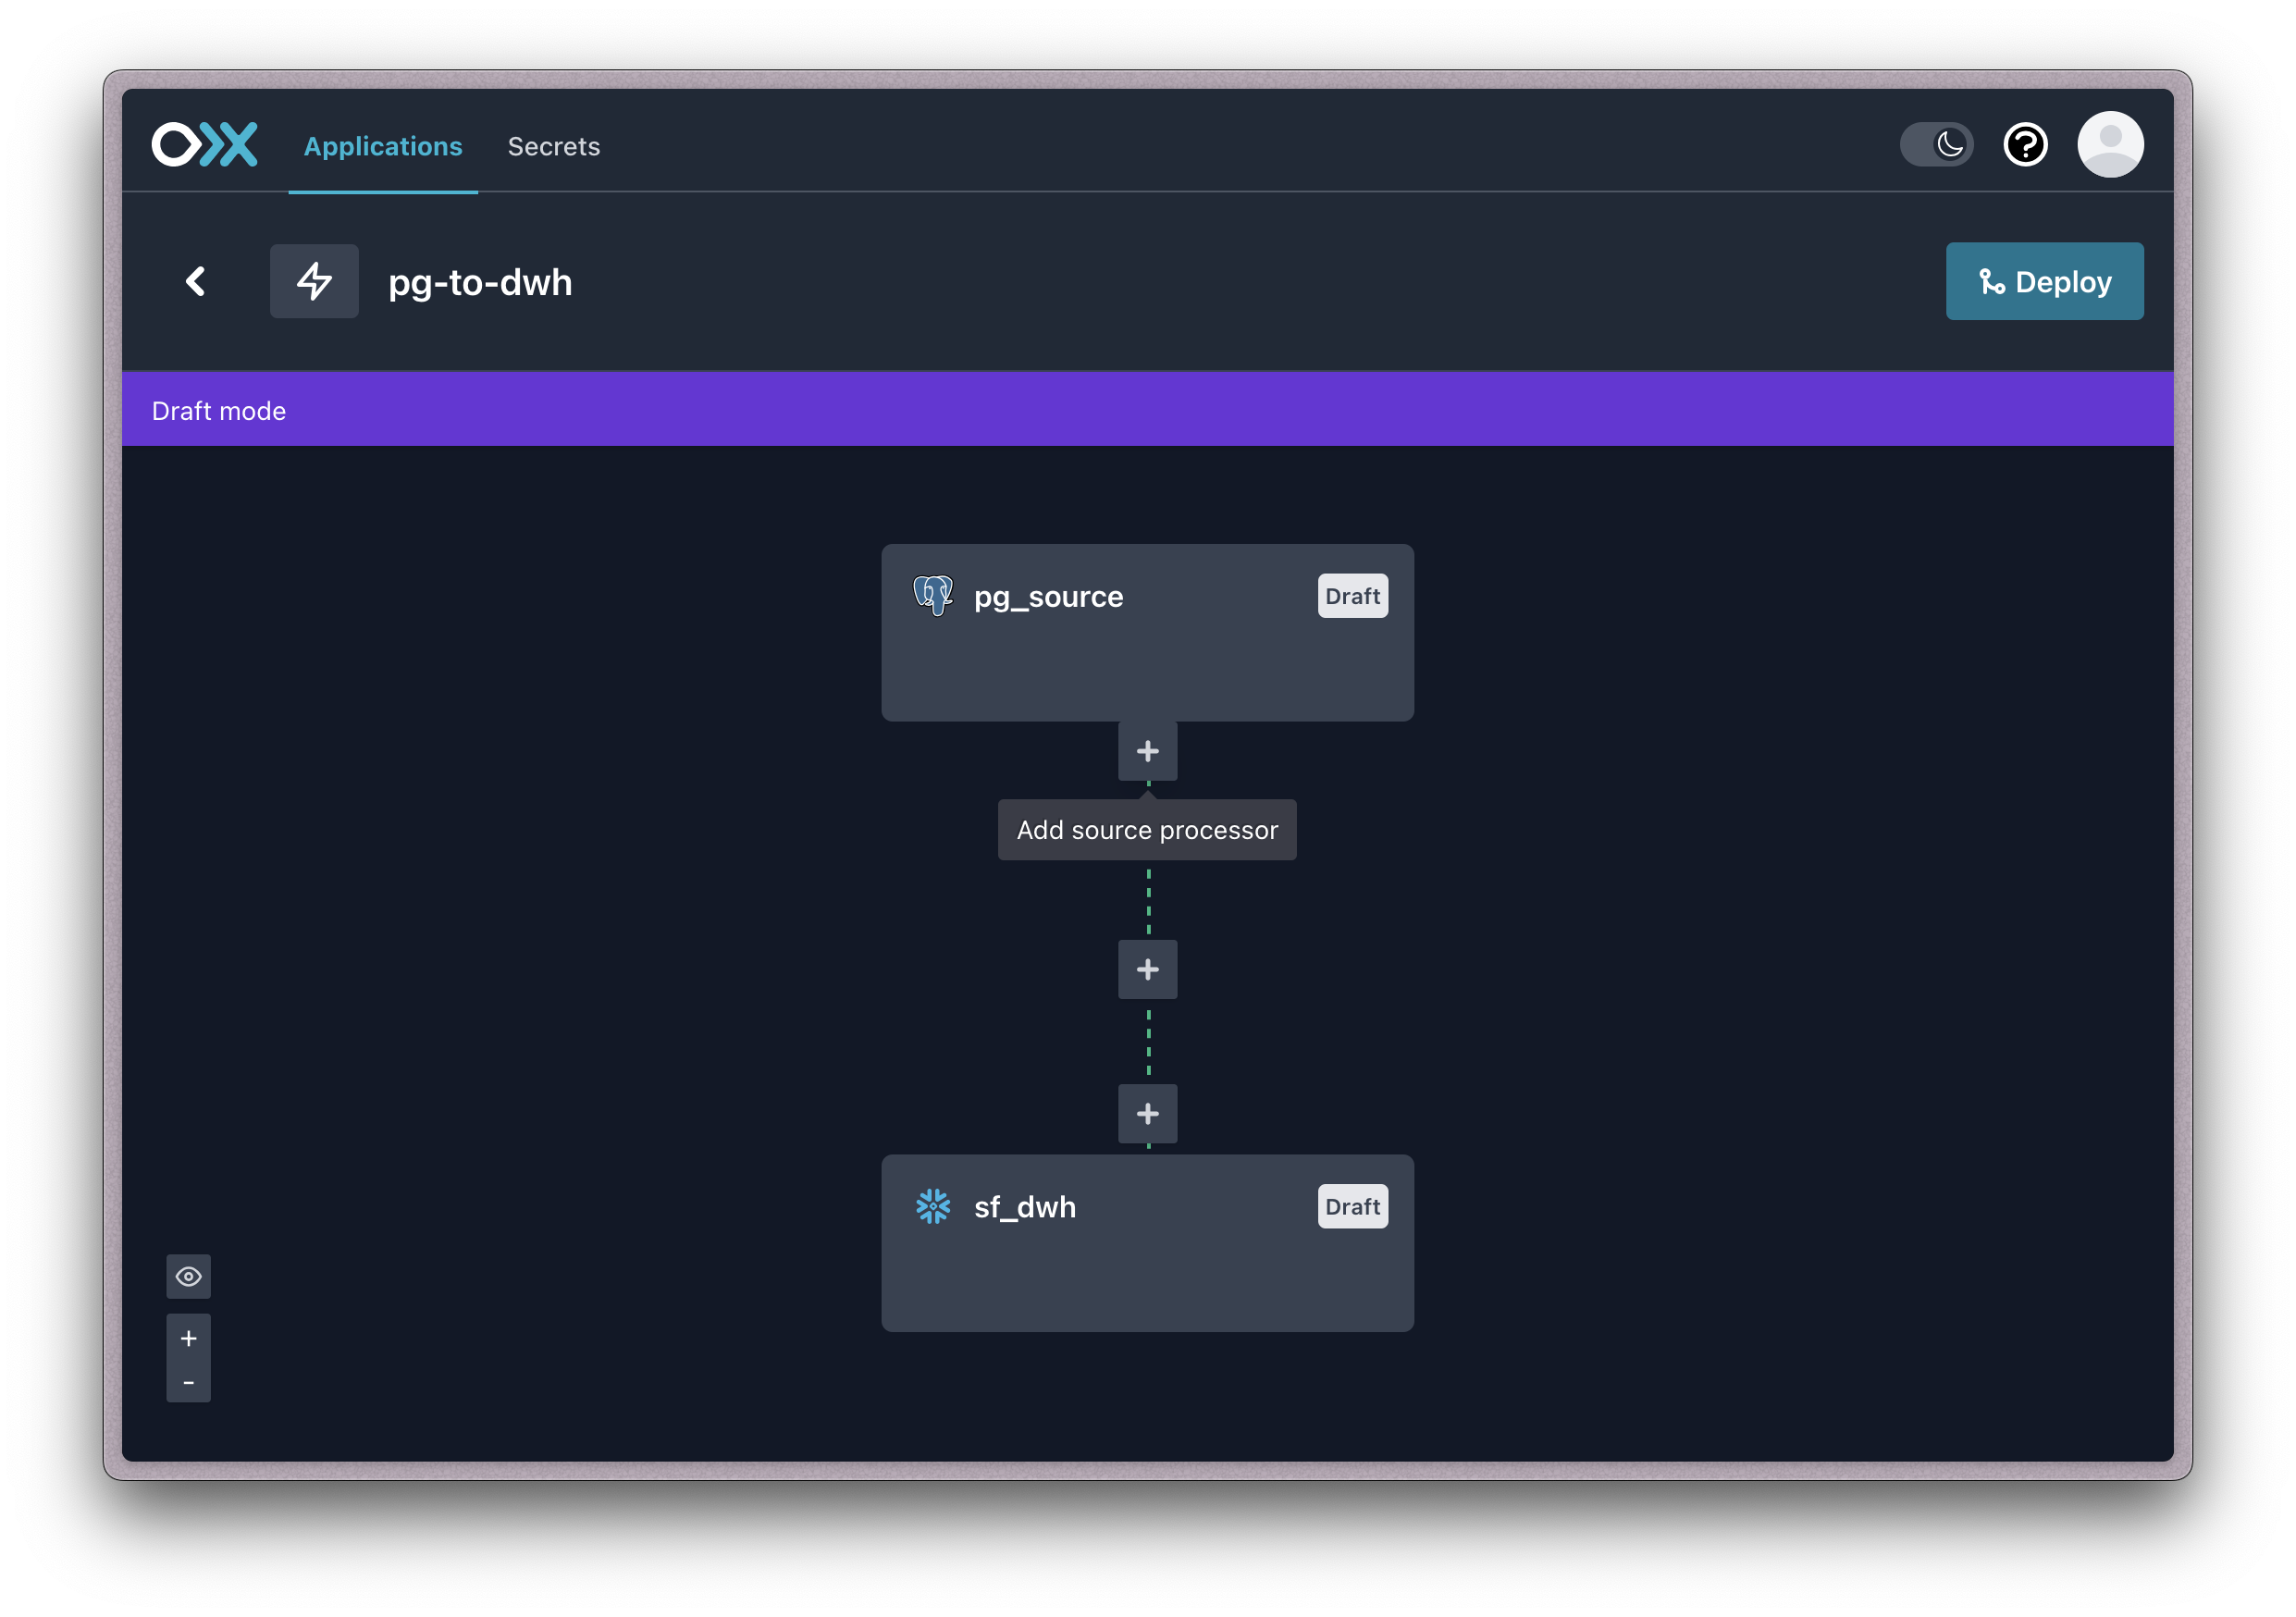
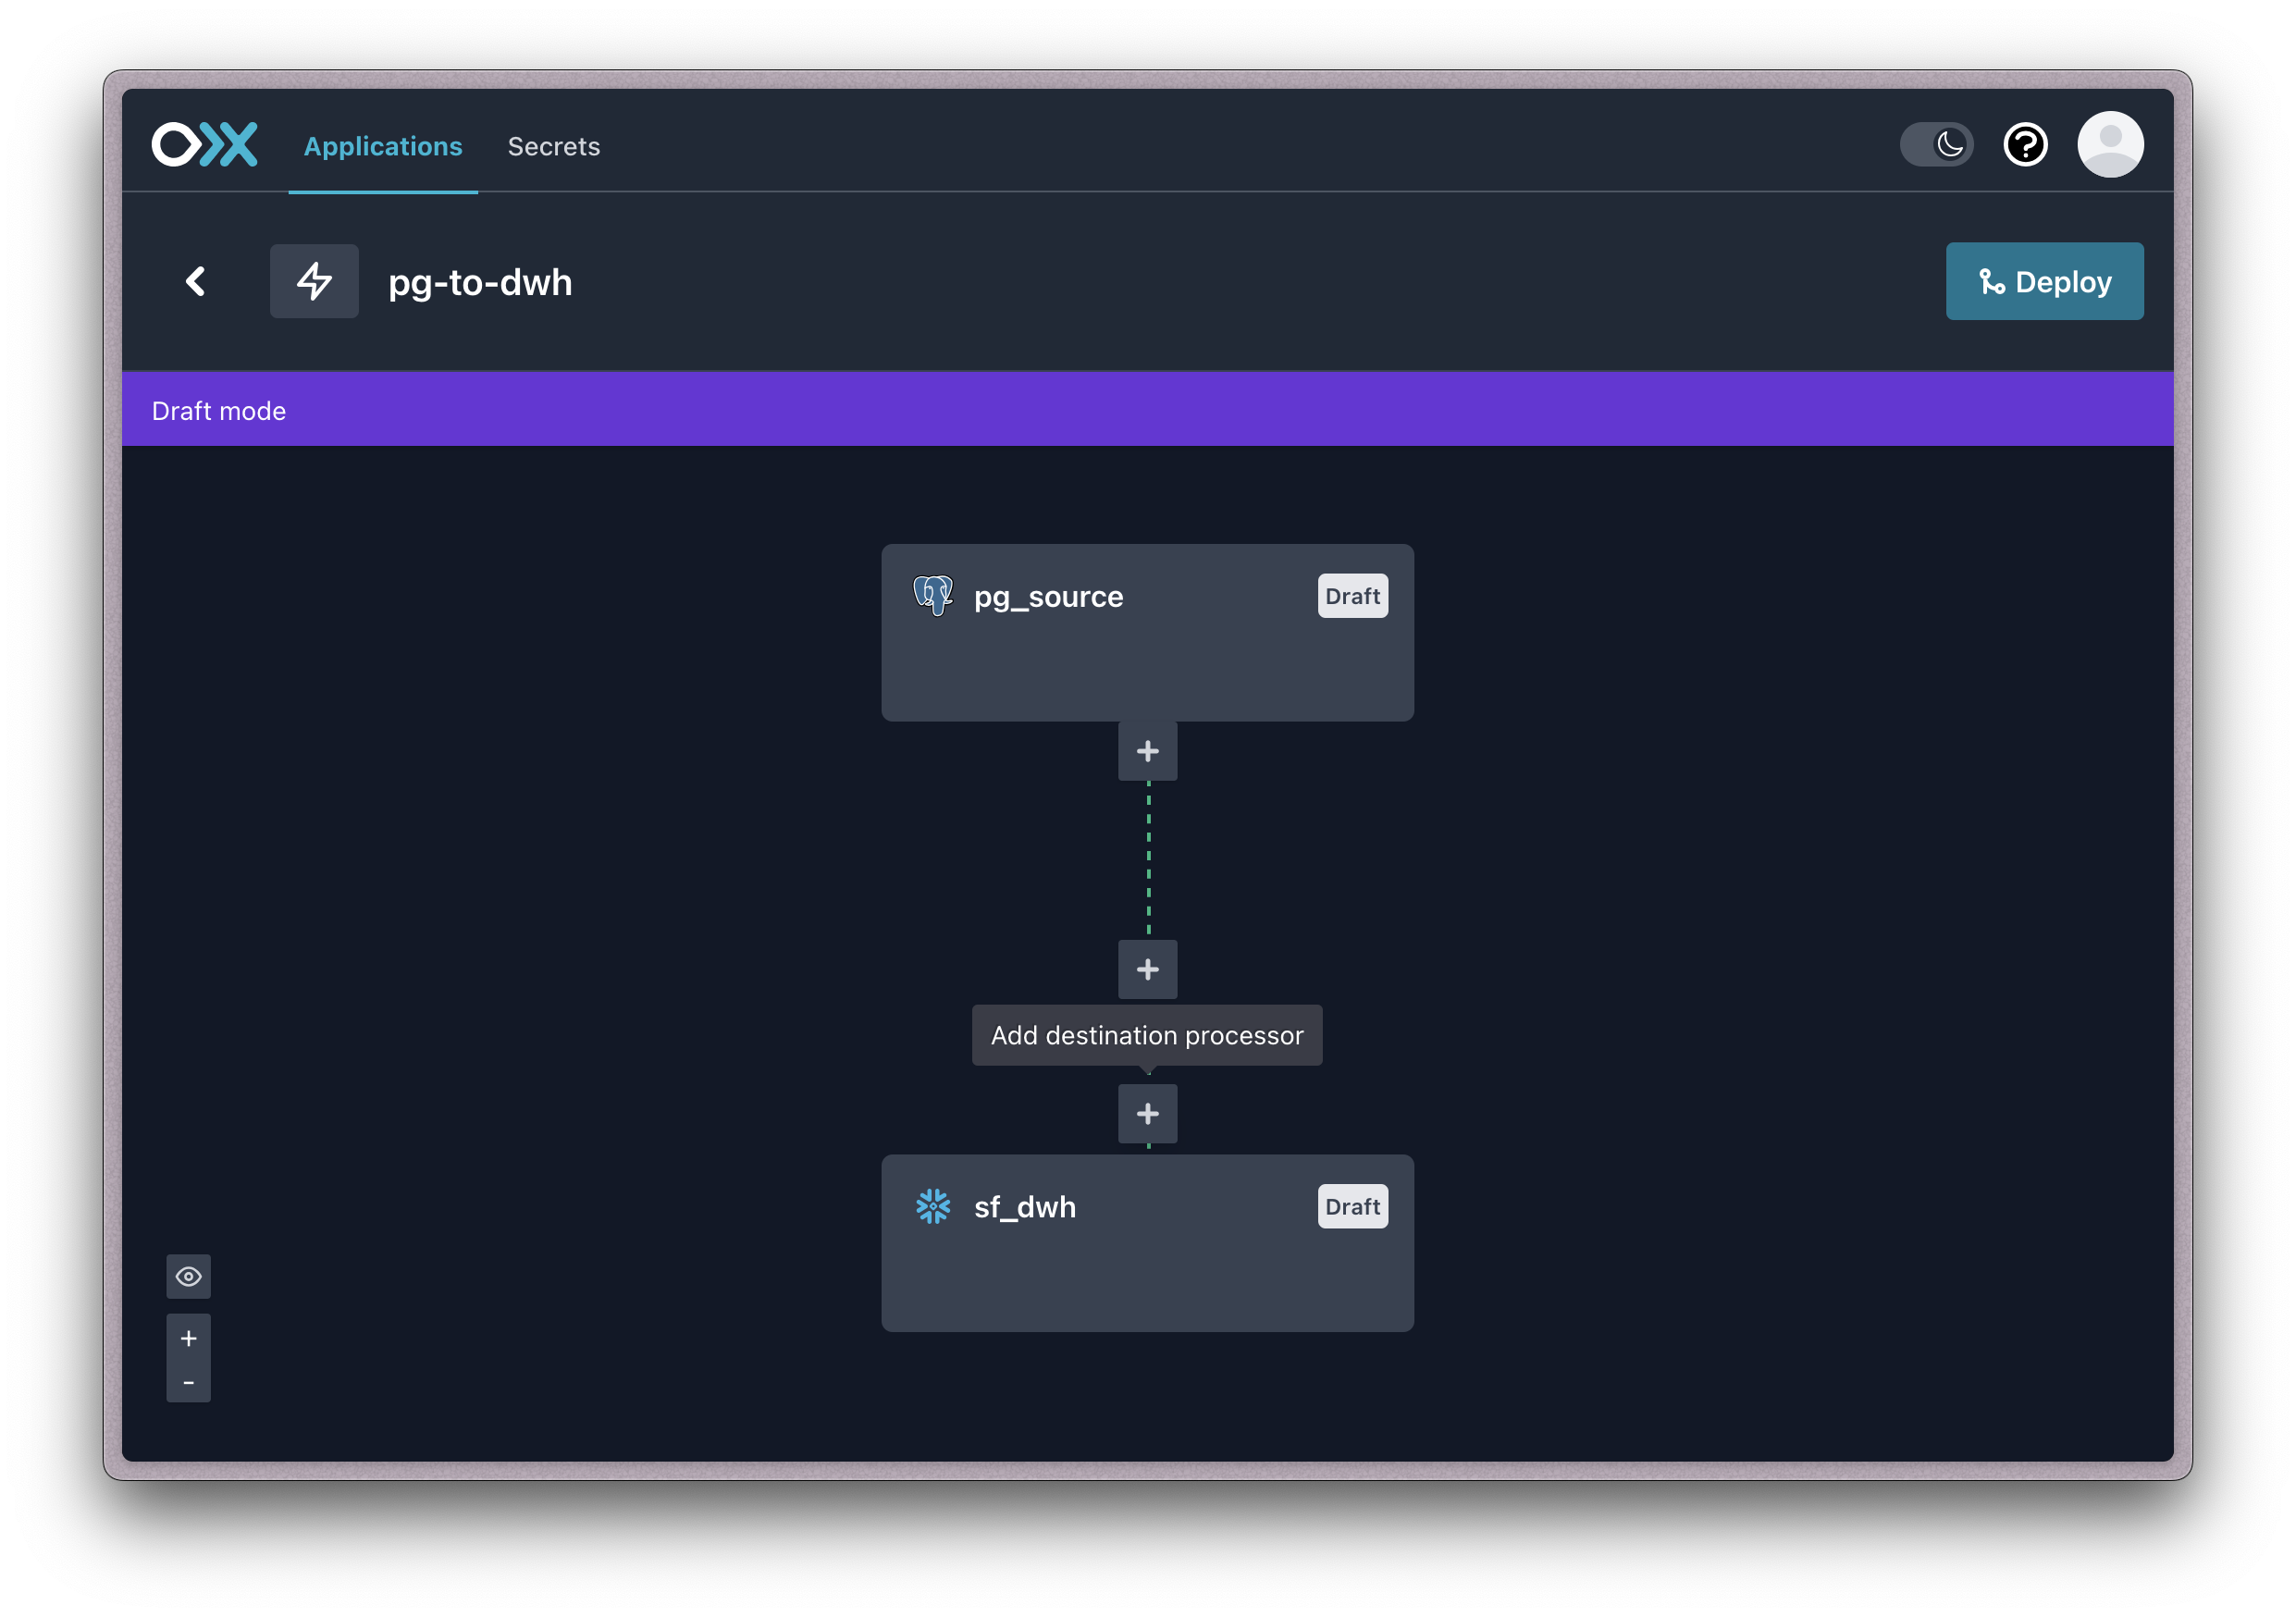
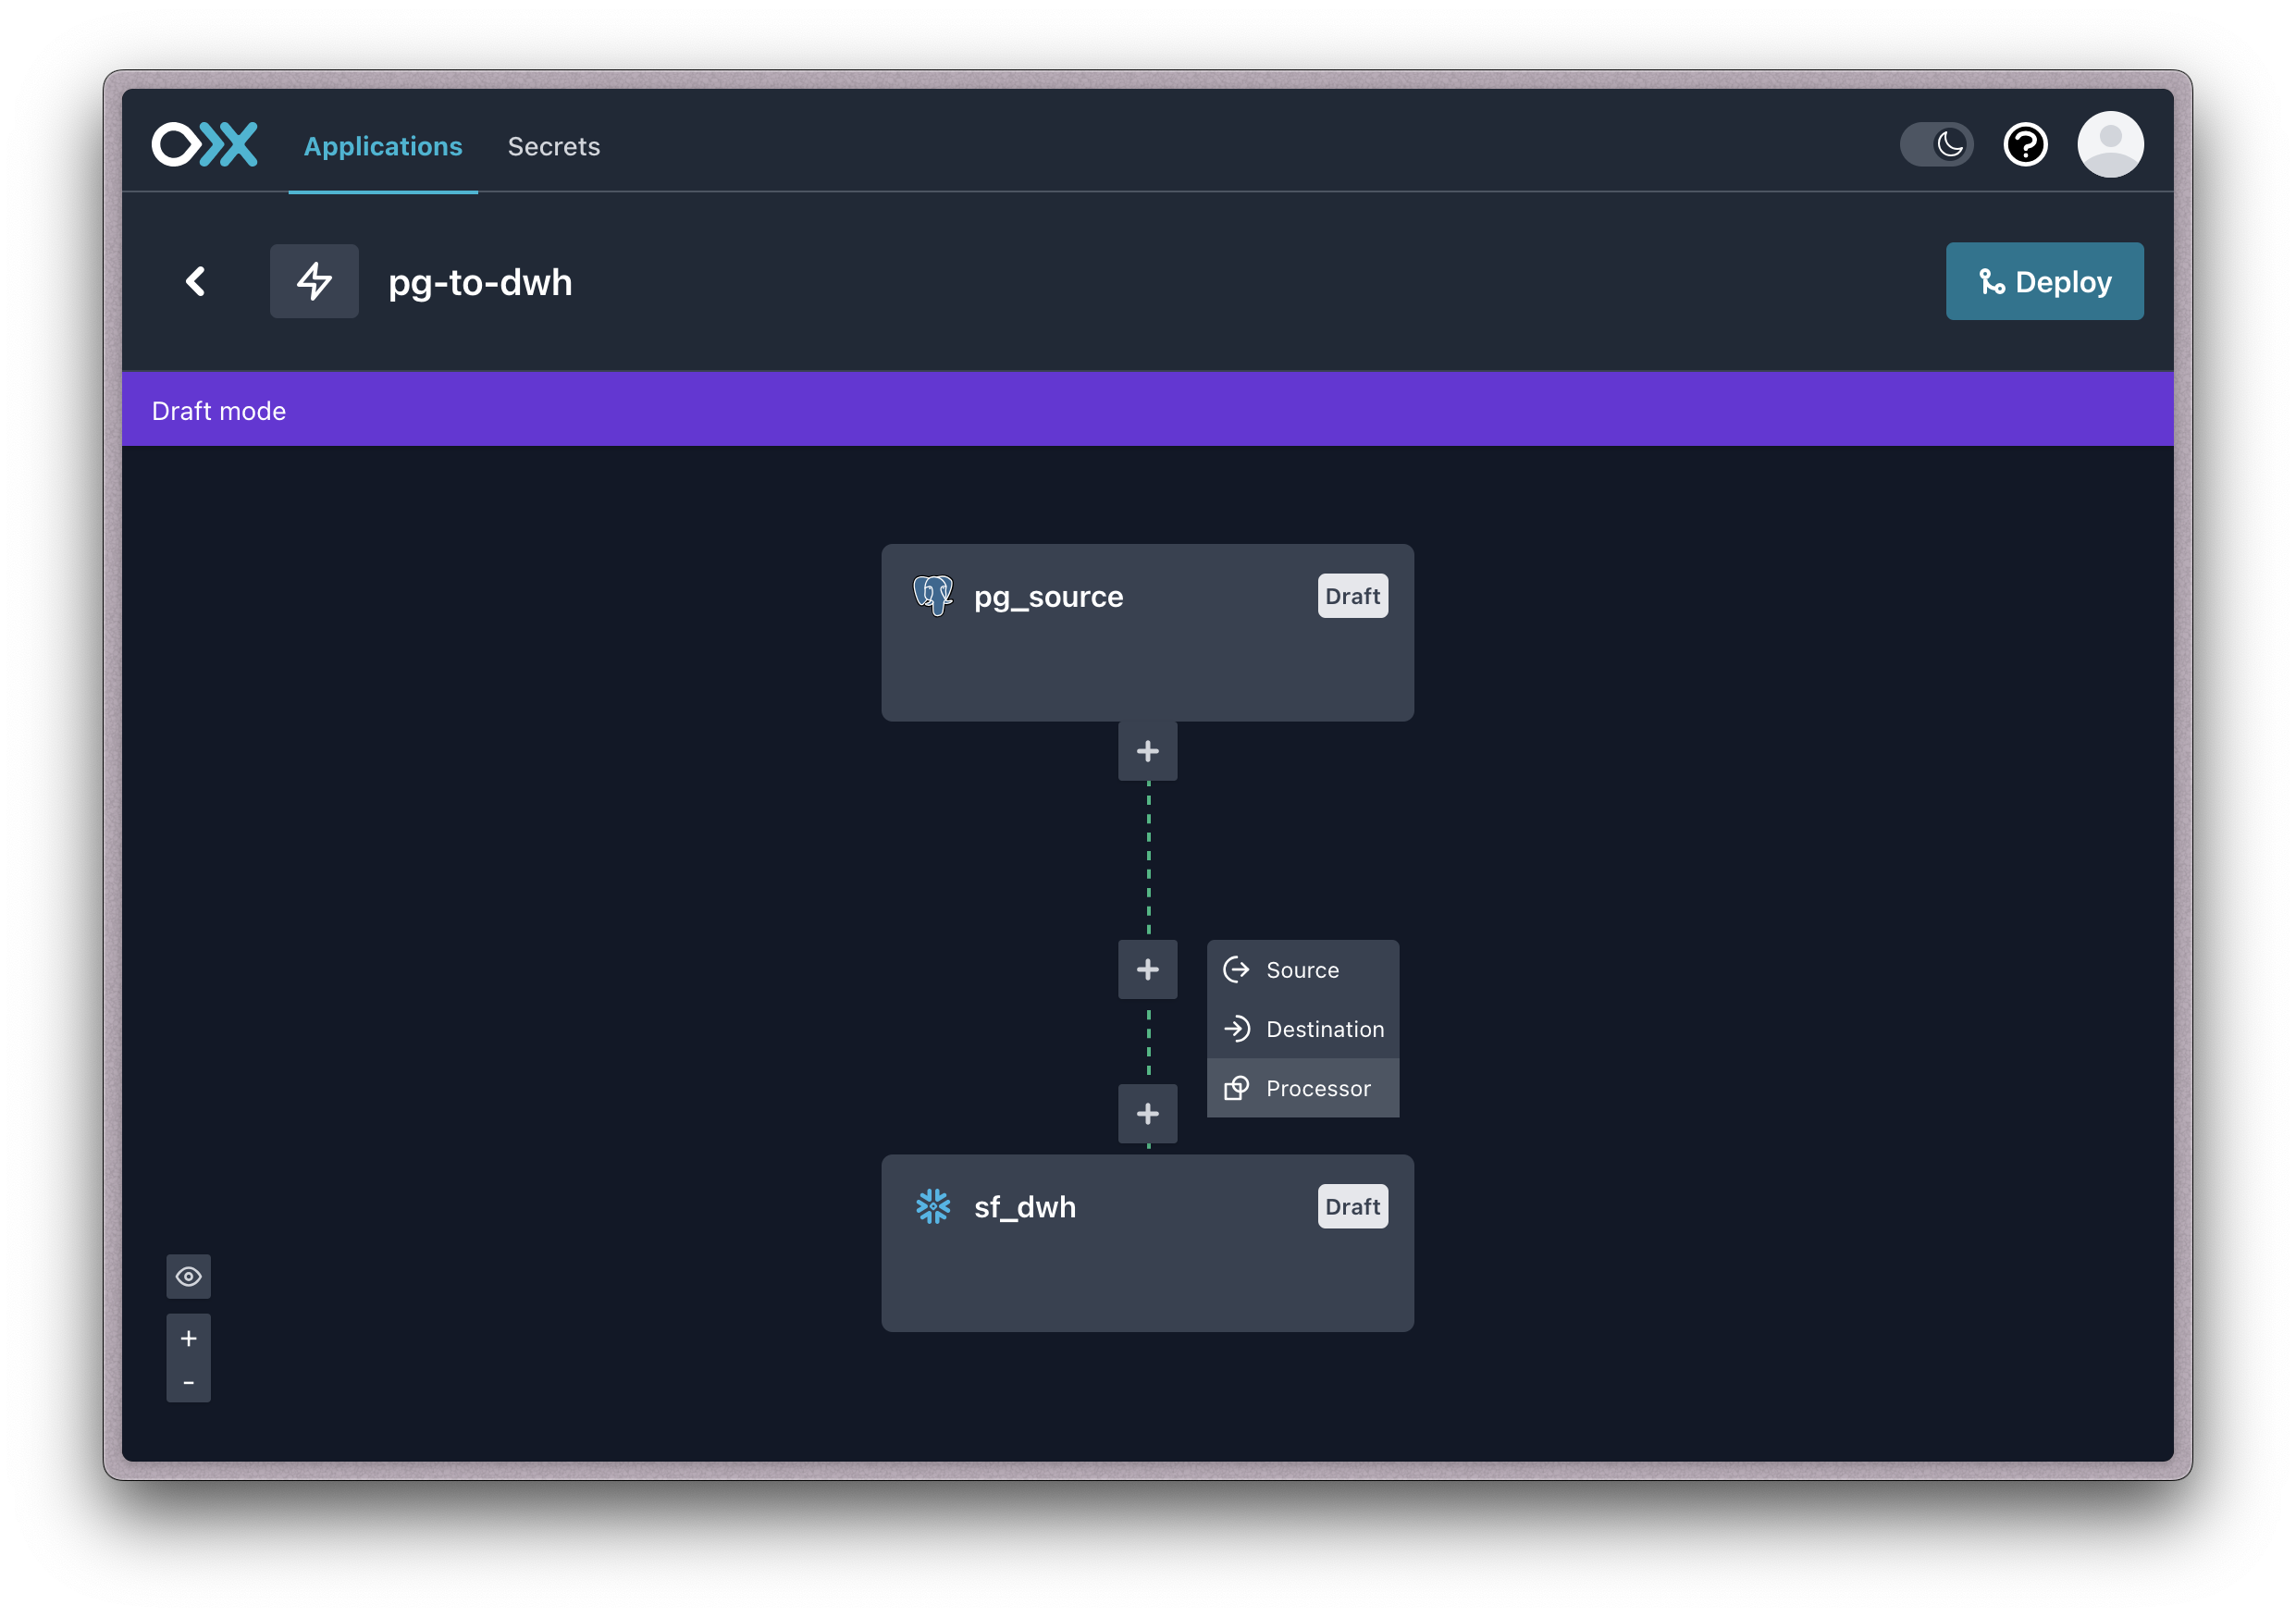
The following diagram is an example of how a simple source to destination appliation with processors between might look:
Important: Configuring aspects of your application may require you to include sensitive information like credentials or other configurations you may not want to include. We recommend obscuring any sensitive information by using secrets.
To trigger the use of secrets in configurations type the $ symbol and the name of the secret. This will prompt a typeahead that will show you which secrets are available to use.
Step 1: Create an application
Creating an application can be accomplished in the Conduit Platform dashboard by taking the following steps:
- Click the Applications tab in the dashboard.
- Click the Create application button.
- Follow the modal prompt and provide a unique name for your application.
- Click the Create button.
You will see an application builder interface. From this point you can proceed to the following steps until you are satisfied with the design of your application.
Step 2: Configure a source
A source connection is required for all applications. To accomplish this, take the following steps:
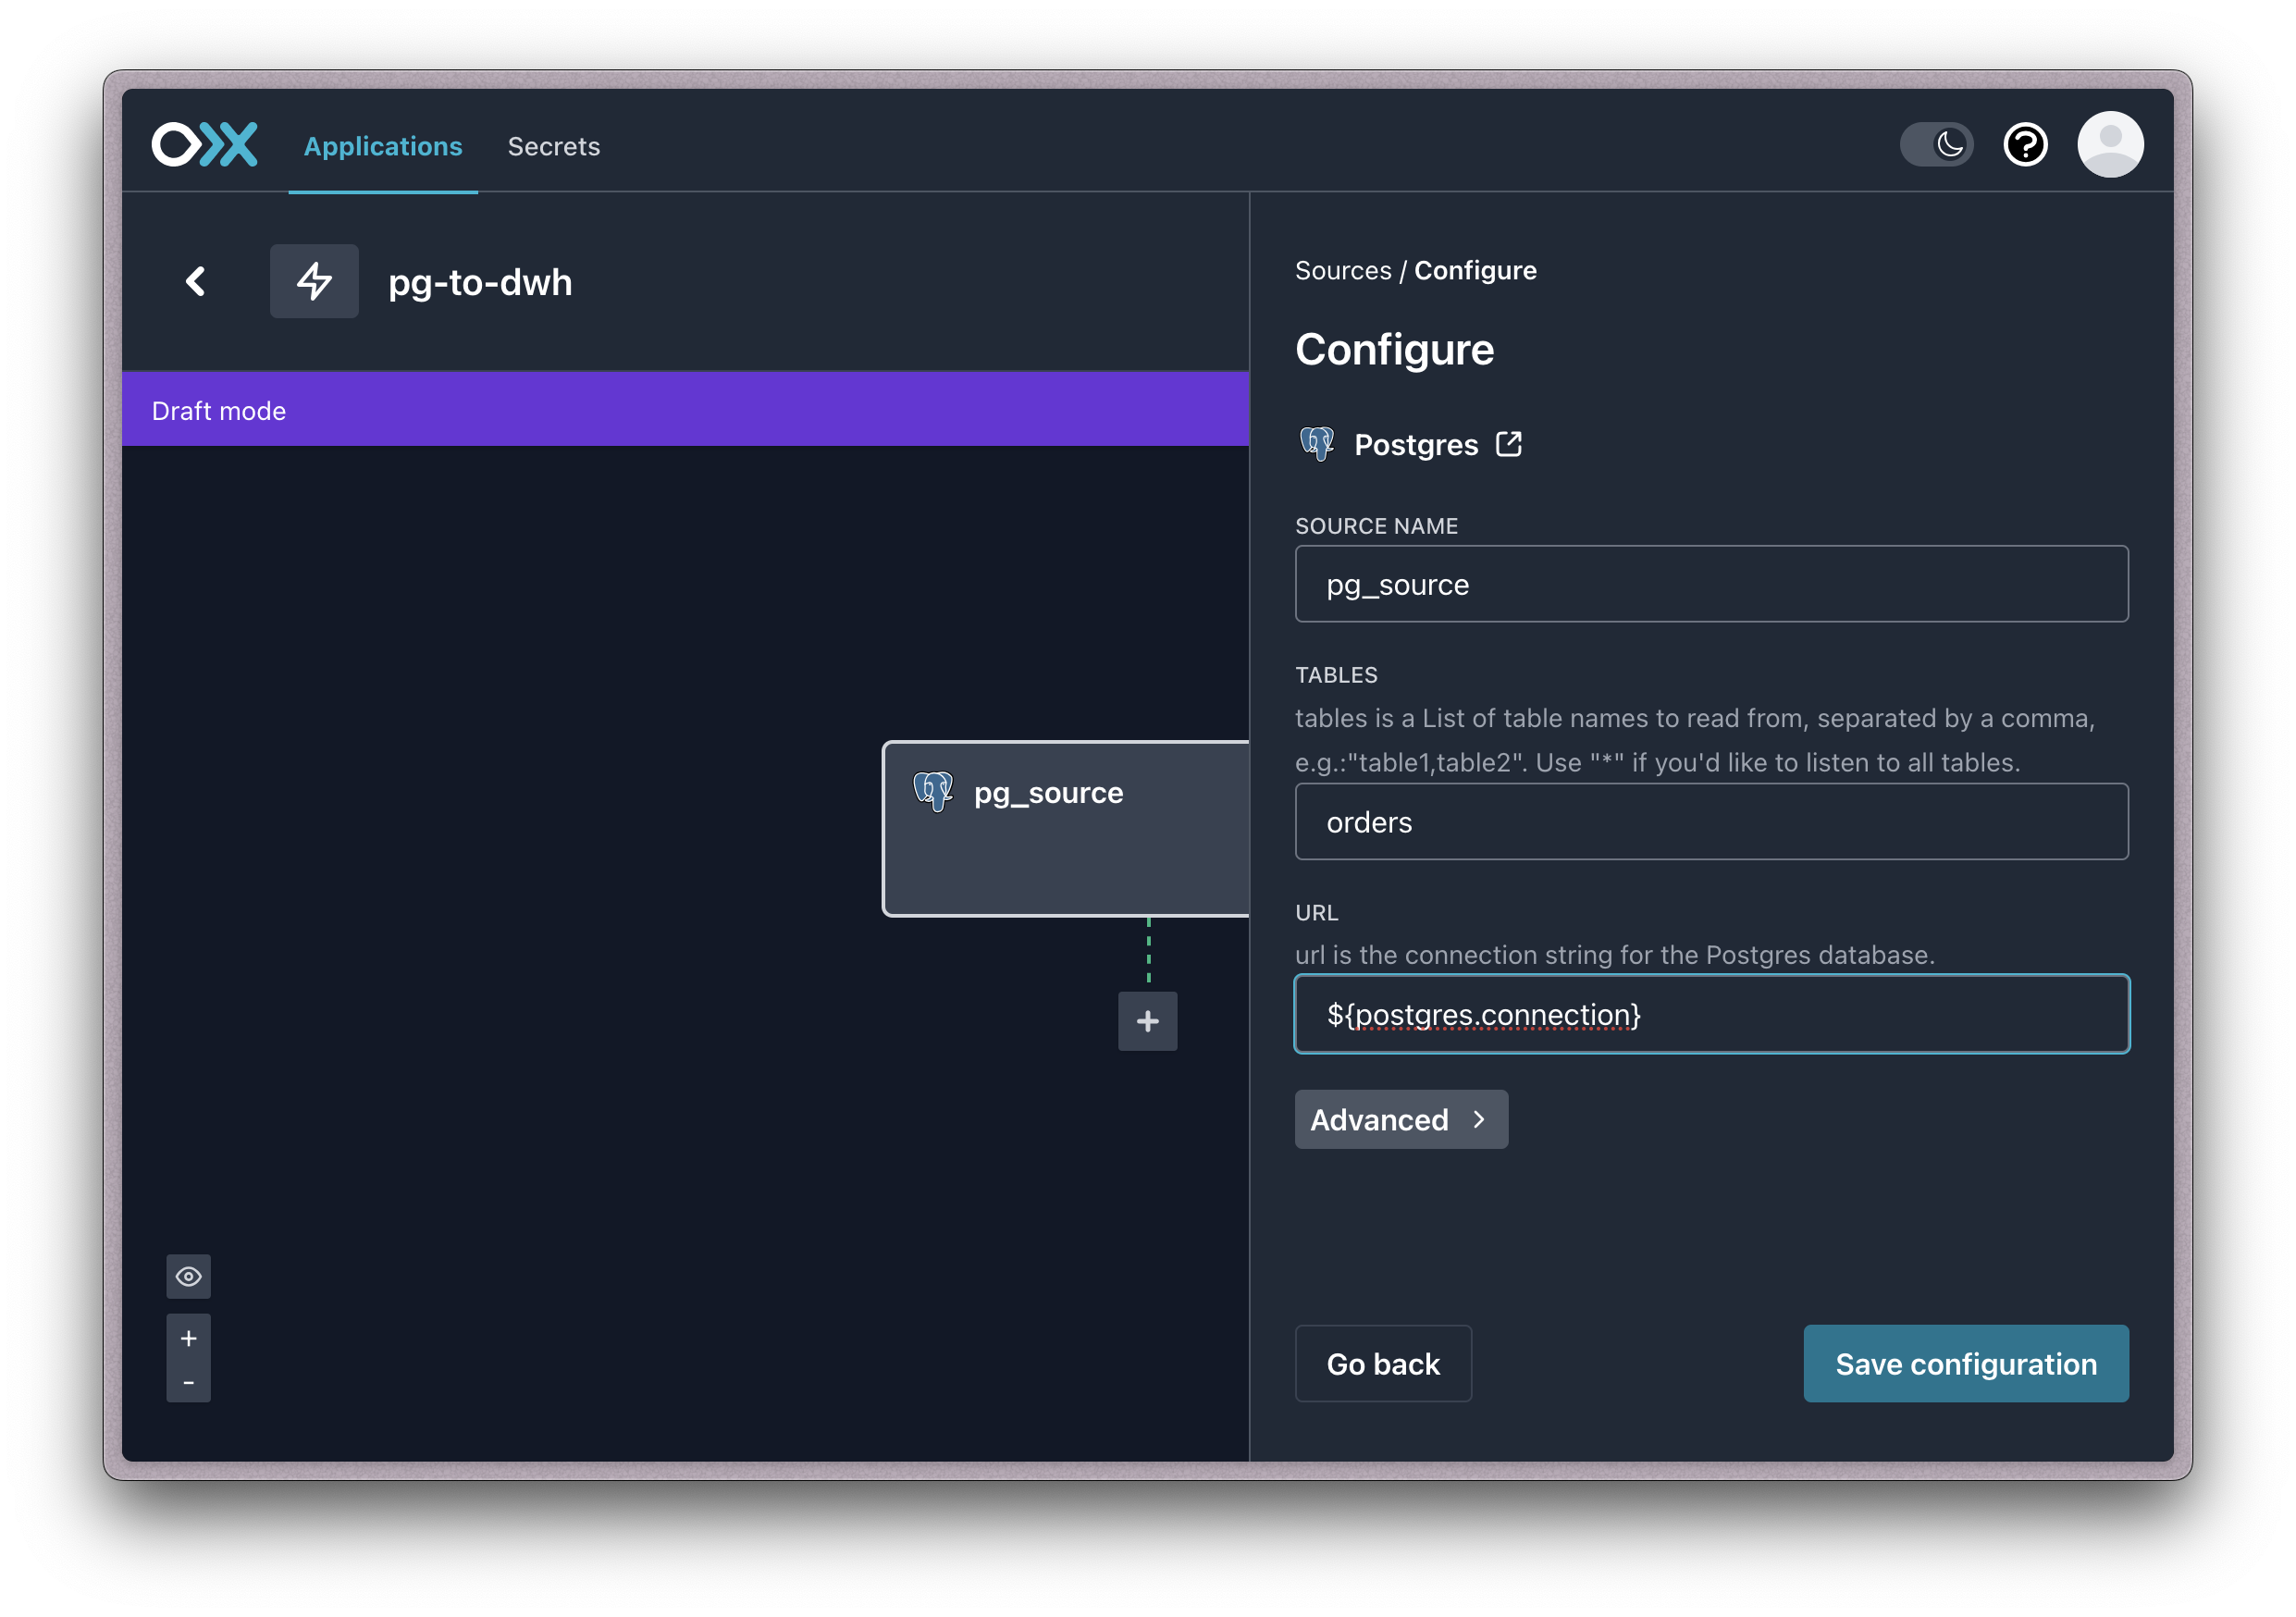
- Click the Source node in the application builder. This should automatically be selected on creation of the application.
- Select a source in the sidebar configuration panel.
- Input the required configurations displayed.
- Click Advanced to display advanced configurations. (optional)
- Once you've completed the source configuration, click the Save configuration button.
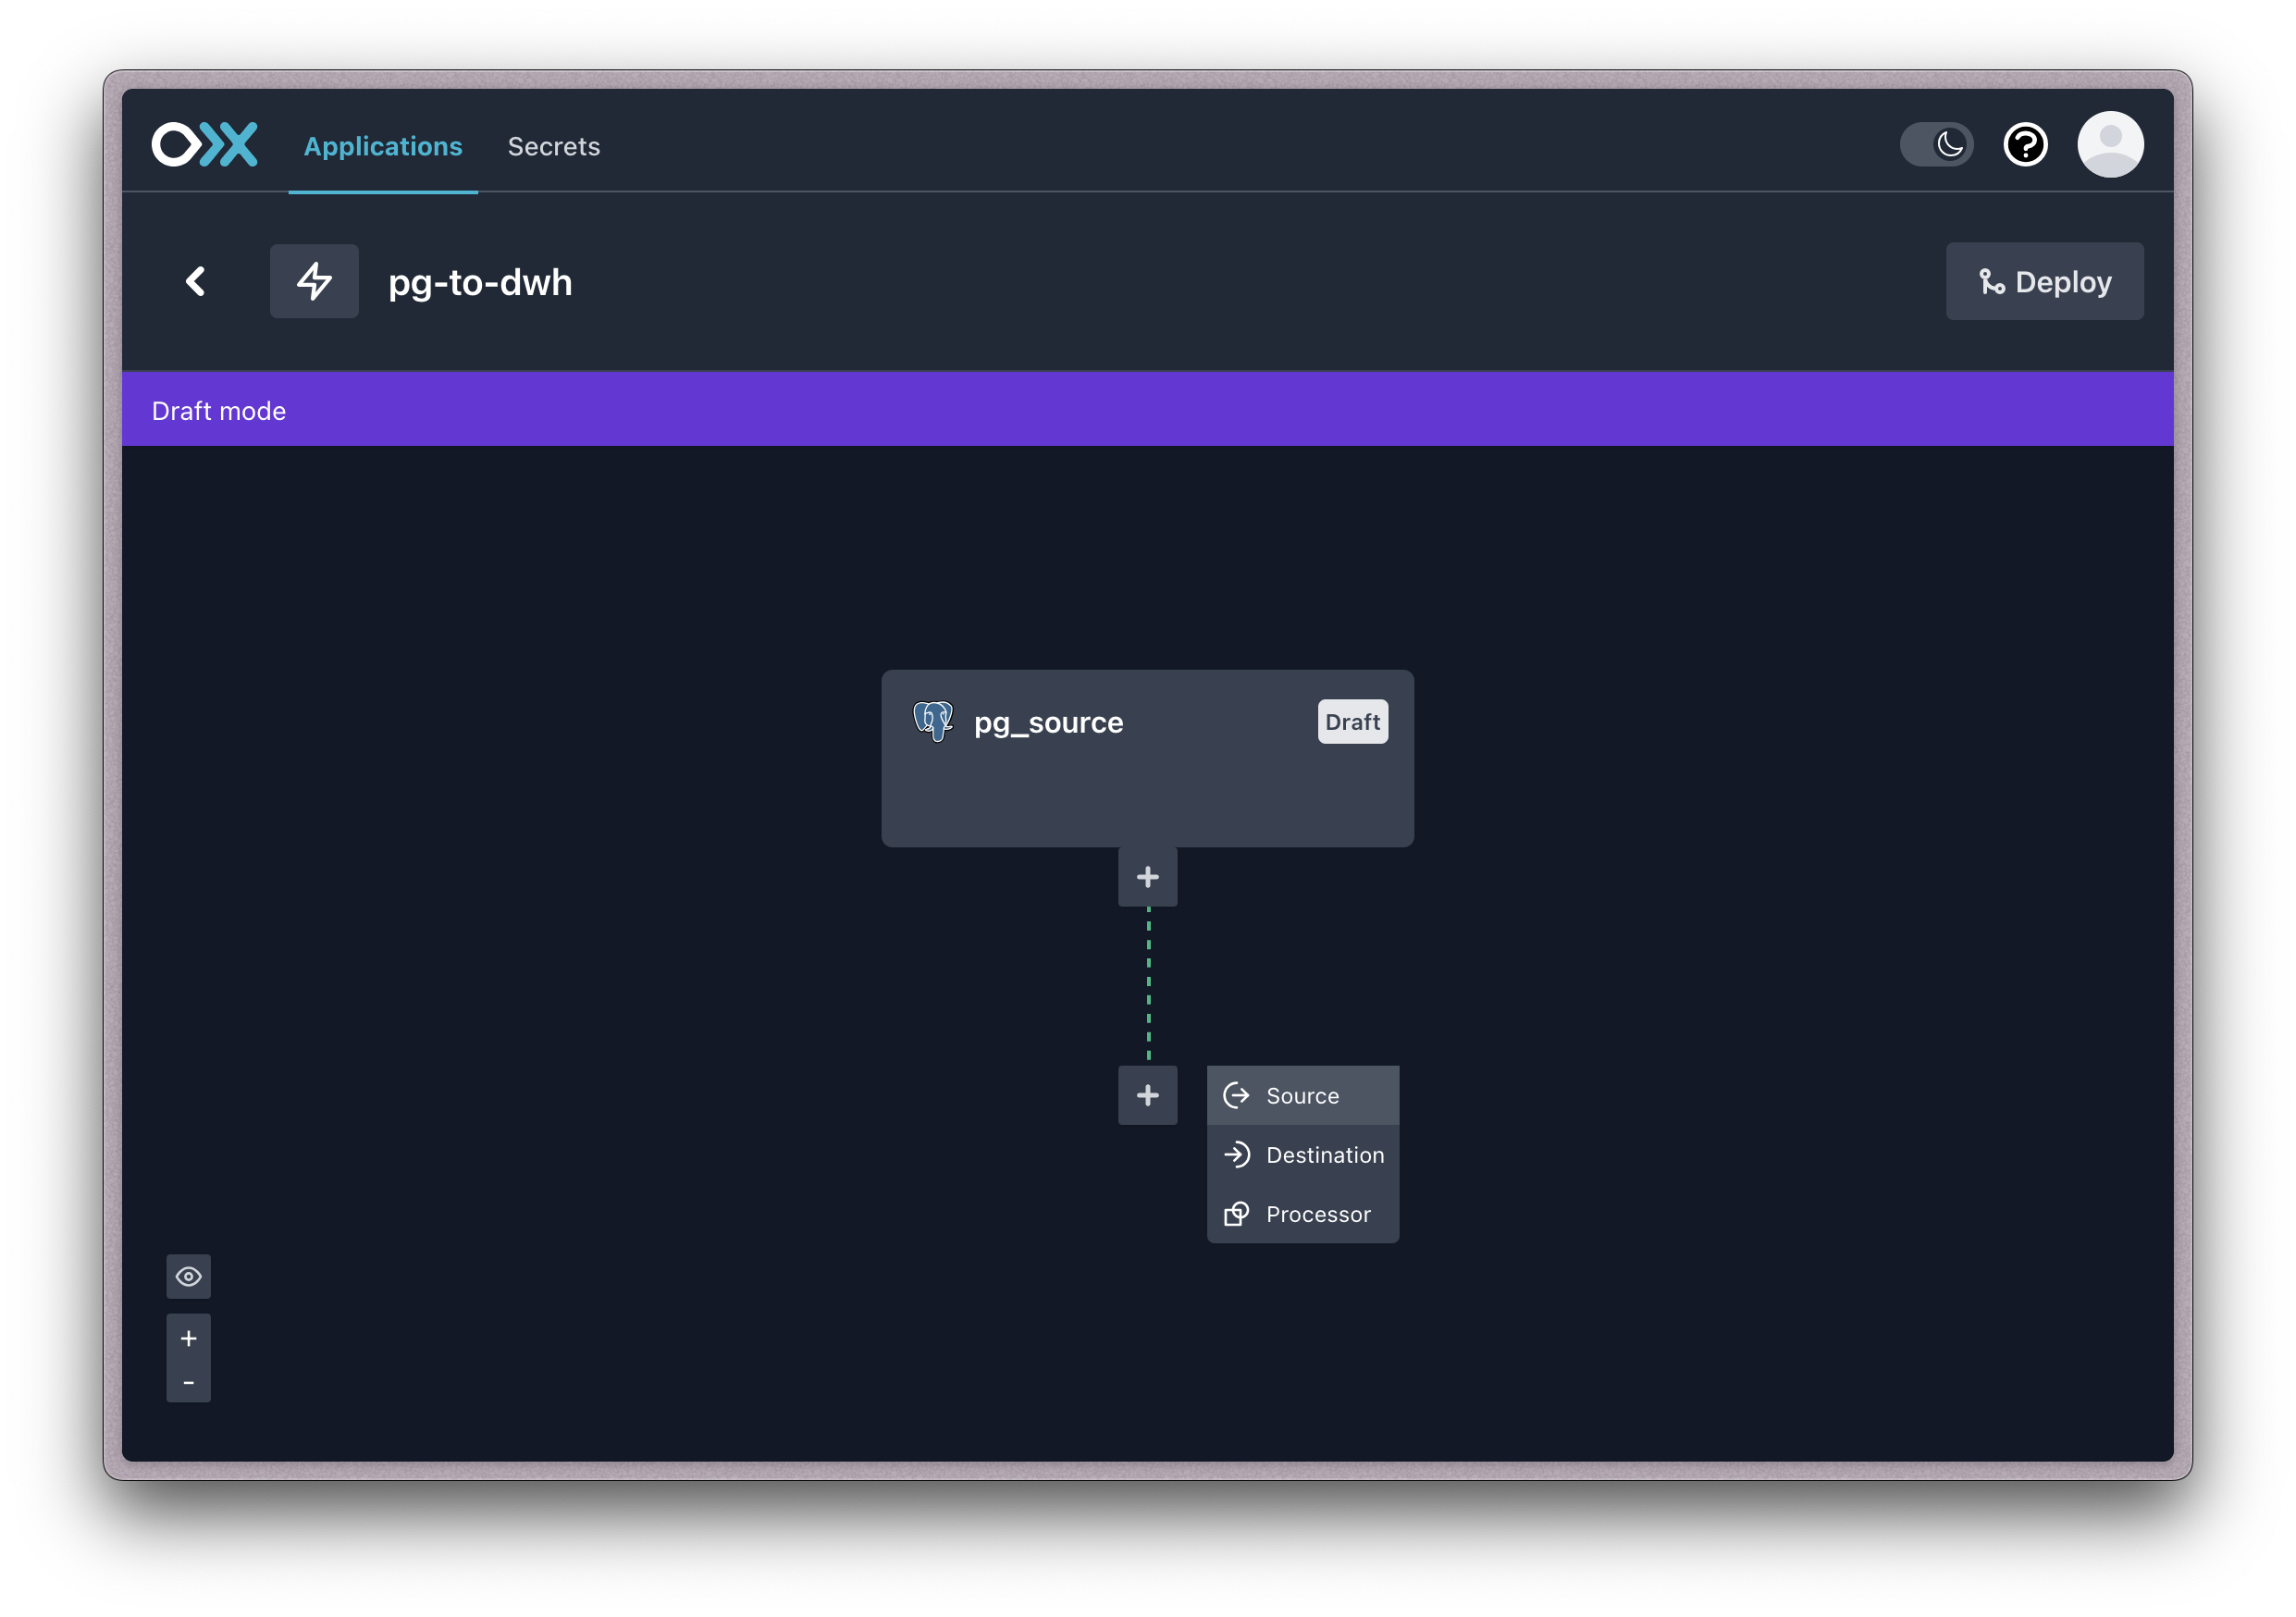
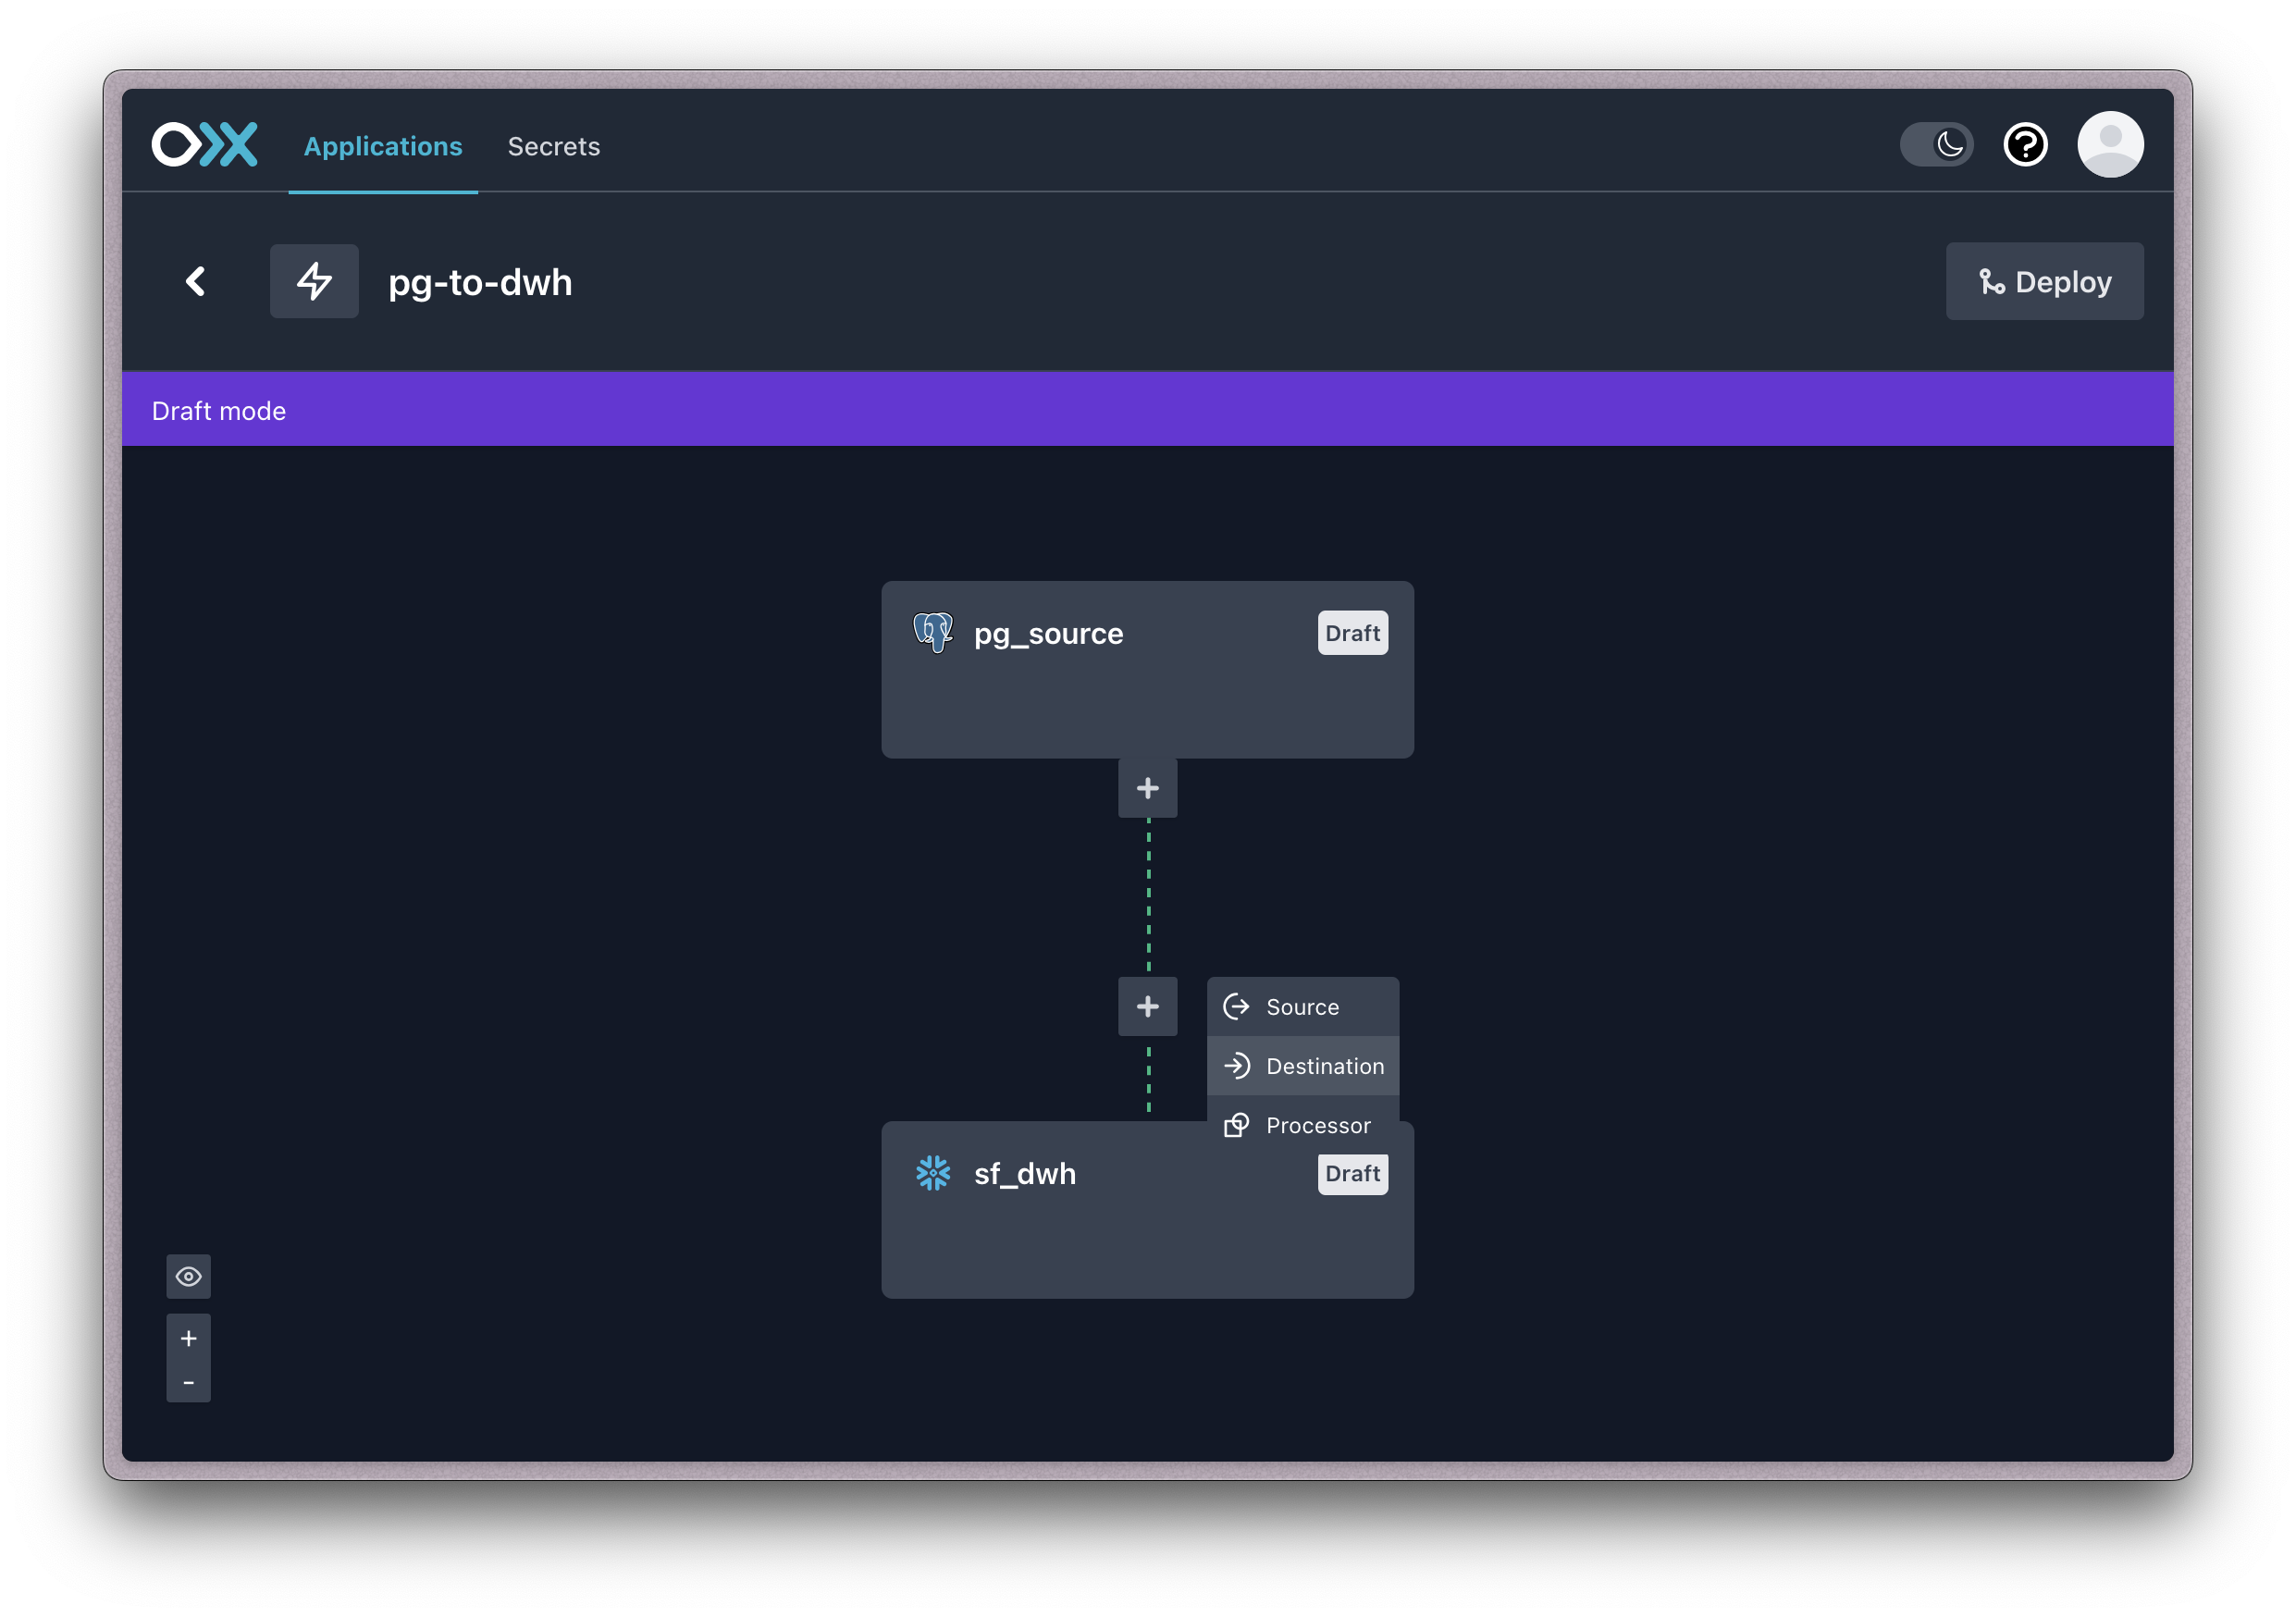
Note: You may add more than one source to your application. To do this, click the [+] on the pipeline and select Source.
Step 3: Configure a destination (optional)
A destination connection can be used to receive data streaming through your application. To accomplish this, take the following steps:
- Click the [+] button on the pipeline.
- Select Destination from the options.
- Select a destination in the sidebar configuration panel.
- Input the required configurations displayed.
- Click Advanced to display advanced configurations. (optional)
- Once you've completed the destination configuration, click the Save configuration button.

Note: You may add more than one Destination to your application. To do this, click the [+] on the pipeline and select Destination.
Step 4: Configure a built-in processor (optional)
Built-in processors can be configured on source and destination connectors, as well as pipelines to transform and filter data based on the needs of your application. See the following instructions on how to configure each in the appropriate context:
Sources
A built-in processor can be added to the configuration of any source. Any data emitted from this source is subject to one or more built-in processors based on their configuration.
- Click the [+] button on the bottom of the source node.
- Select a built-in processor in the sidebar configuration panel.
- Input the required configurations displayed.
- Input any desired conditions. (optional)
- Once you've completed the built-in processor configuration, click the Save configuration button.
Destinations
A built-in processor can be added to the configuration of any destination. Any data produced to this destination is subject to one or more built-in processors based on their configuration.
- Click the [+] button on the bottom of the destination node.
- Select a built-in processor in the sidebar configuration panel.
- Input the required configurations displayed.
- Input any desired conditions. (optional)
- Once you've completed the built-in processor configuration, click the Save configuration button.
Pipelines
A built-in processor can be added to the configuration of any pipeline. Any data streamed through this pipeline is subject to one or more built-in processors based on their configuration.
- Click the [+] button on the upper part of the application pipeline.
- Select Processor from the options.
- Select a built-in processor in the sidebar configuration panel.
- Input the required configurations displayed.
- Input any desired conditions. (optional)
- Once you've completed the built-in processor configuration, click Save configuration button.
Conditions
Conditions are optional and may be used in a built-in processor configuration to specify what data should be executed. If the provided expression is true for a data record, the processor will execute against it. Otherwise, the data record will continue to stream through to the next step in the application.
- In the built-in processor conditions field, input your condition.
- Once you've completed the built-in processor configuration, click the Save configuration button.
Step 5: Deploy an application
Once you are satisified with the design of your application, containing at least one source, you will see the Deploy button become actionable. To accomplish this, take the following steps:
- Review the design of your application.
- Click Deploy.